
Let’s face it; light bulbs are prone to failure because most of them are flimsy. Luckily, most popular bulbs like Philips Hue have a thicker base, making removal easier even when the glass breaks. However, removing bulbs from the recessed socket is difficult because of the tight space in the ceiling.
Thankfully, many of the old fixes still work, like duct tape or pliers. Don’t try the raw potato method as it can introduce moisture, causing a short in the socket.
Another tip to consider is wearing protective gloves and glasses to protect yourself encase the bulb breaks. Do not forget to turn off the breaker for those fixtures just to be on the safe side. Turning off the switch may not work all the time, as it may be difficult to tell which switch controls each light. To prevent bulbs from sticking, simply wipe the base and the socket.
Here are some ways to remove stuck recessed light bulbs quickly and safely.
Pliers
While the spacing is tight in your ceiling, it would not hurt to use a plier. It is one of the simplest ways to remove the base of the light bulb if it breaks.
The more intact the bulb is, the better chance this technique will work. Start by turning off the breaker to the light source. If the filament is still whole, grasp the glass base with needle tip pliers. Then, slowly open the pliers and twist counter-clockwise. This technique is simple and works 99% of the time.
Using Duct Tape
Recessed light bulbs are so large that they take up the entire space of the fixture. Hence, it’s difficult to fit your fingers between the fixture and the light bulb to unscrew it. In that case, you can grab duct tape to help remove the stuck bulb. This method makes it an ideal fix because it works even on unstuck bulbs.
First, turn off the breaker to avoid electrocution and leave the bulb for five minutes to allow it to cool. Use a ladder and ensure that someone gives you a hand to keep the ladder steady. Take approx five inches of duct tape and fold it to create a handhold and press the tape on the base of the bulb and twist to the left.
The duct tape will create a secure hold on the bulb so you can twist it free.
Suction Cup- Light Bulb Remover
A light bulb remover has a tight grip on the bulb, so you can remove a bulb hands-free. It works best with flat bottom recessed fixtures because of the wide base. This product is readily available, and even if the suction breaks, add a little water to the cup and try again.
If you are looking for a durable light bulb changer, try the DOCAZOO. It has strong suction and comes with a pole, so there’s no need for ladders.
Try Using A Plastic Bottle (It Actually Works)
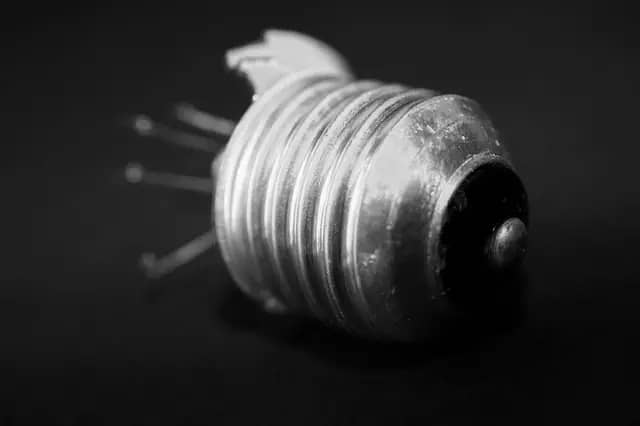
If you are in the process of unscrewing a recessed light bulb and it breaks, leaving the metal base locked into the fixture, then you can use a plastic bottle to remove it.
- Grab a Cola empty bottle.
- With a lighter, heat the mouth of the bottle.
- Then, insert the bottle into the cap and twist it to the left.
How To Change Bulb On Recessed Light? -Metal Ring Style?
Tools needed:
- The replacement light fixture.
- A non-contact voltage tester.
- Screwdriver.
Method
- Ensure to turn off the light switch and breaker.
- If it is LEDs wait 5 mins, or with halogen, wait 20 mins.
- Place the screwdriver in between the spring clips and the bulb.
- Gently wiggle the screw drive, and the spring clips should pop right off.
- The bulb will hang down.
- Unscrew the bulb from the socket.
- Screw the new bulb.
- Push the bulb back and push the clip back in the fixture
Recessed Lighting And Your Basement- The Perfect Spacing
It is in your best interest to plan out your layout and spacing strategies before installing recessed lighting in a basement. It’s critical not to position lights too close or far apart from each fixture.
A great rule of thumb is to measure your basement ceiling height and divide that number by two. For instance, if your ceiling is 10 feet, then position the fixtures five feet apart.
However, consider YOUR basement lighting needs. If there are no other sources of lighting, then you may have to add more or fewer if there are any other issues.
An excellent tip I found from Lightup.com is to overlight the room with dimmable bulbs and use dimmers to control the brightness. This strategy works best with recessed lights in the basements because these places usually lack natural lighting.
Removing Recessed Lighting Clips (Important turn Off the breaker)
I can not stress enough how important it is to turn off the breaker to the lights you are fixing, as flipping the switch isn’t good enough. Depending on the fixture, there will be two or four clips holding the light in place.
You’ll notice slots in each clip. Insert a flathead screwdriver in each slot and gently push up. The force will release the clip, making it easy for you to remove the light.
If this technique doesn’t work, consider Chandler’s method for removing recessed lighting clips. He posted in the do-it-yourself forum to help a fellow member.
Welcome to the forums! Take a pair of needle nose pliers and pull inward on the little tab you see at the top of the clip. That will release the tension of the spring clip and it will fall inward. Do that to all the clips and you should be able to withdraw the fixture fairly easily. Make sure your clips stay inside the canister or they may snag. Let us know if that works for you.
Chandler, 2013
The Common Reasons Why Your Recessed Light Bulb is Stuck
I can’t let you leave without outlining the reasons this happens. For me, rusting of the light bulb base is the culprit.
Other problems include:
- Old age
- Dust build-up.
- Cheap parts.
To Recap,
While a plier and duct tape works great to remove stuck recessed light bulbs, a light bulb changer is my favorite. This product can remove any bulb, no matter its location. Furthermore, changing a recessed bulb can be tricky because you’ll need to disassemble the fixture to get to the bulb, but the video above can help.


